

IP camera and NVR setup guide
Prepare the camera or recorder connection. Follow the steps for your device, check recording licences and open the first recording.
What needs to be ready?
Check RTSP support
RTSP is a protocol used to connect to a camera’s video stream. You will need the stream path and connection details provided by the manufacturer.
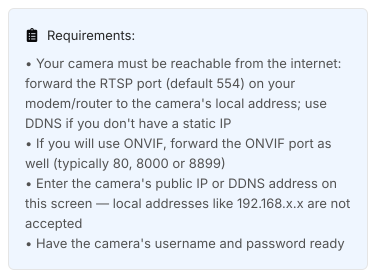
Set up external access
An address that works only on your local network is not enough. Prepare a public IP and the required access settings with your network administrator. If your connection uses CGNAT, contact your internet provider. Limit network access to the connections you need. Do not disable the firewall entirely or give the camera unrestricted access.
Gather the connection details
Have the public IP address, RTSP port, stream path, username and password ready. Enter these only in the relevant fields in the product panel.
Start with the device type
Open the device chooser
On the Cameras page, select Add Camera.
Choose your device type
Select IP Camera for a single camera’s RTSP stream or NVR / DVR to scan channels connected to a recorder.
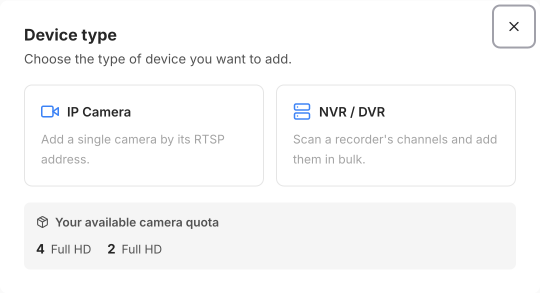
Device type
IP Camera
Step 1 Check the requirements
Step 2 Name and organise the camera
Enter a camera name
Enter a descriptive name such as Front entrance in Camera Name. This field is required.
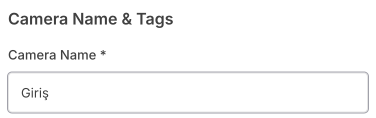
Camera name field Add a location and description
Use Description and Location for details useful to your team, such as Visitor entrance and Main site / Entrance.
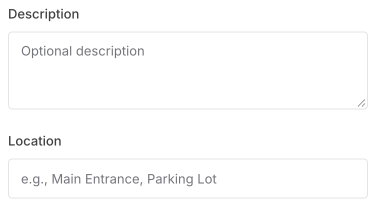
Description and location fields Select tags
Choose existing entries in Tags, or use Create to create a new one.
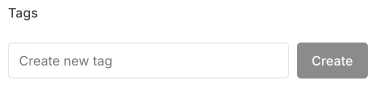
Camera tags
Step 3 Verify the RTSP connection
Enter the address and stream path
Enter the externally reachable address in Camera IP Address and the RTSP port in Port. The default is 554, but your network may use a different external port. Enter the manufacturer’s RTSP path in Stream Path if provided. This field can be left empty for most IP cameras.
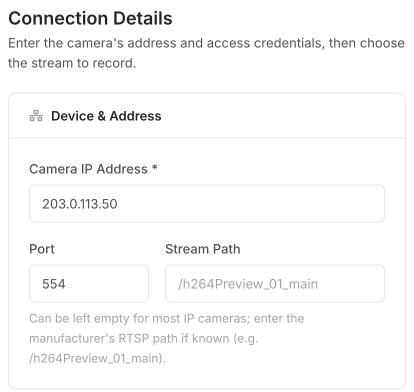
Address, RTSP port and stream path Enter the camera credentials
In Access Credentials, enter the camera username and password or select saved credentials.
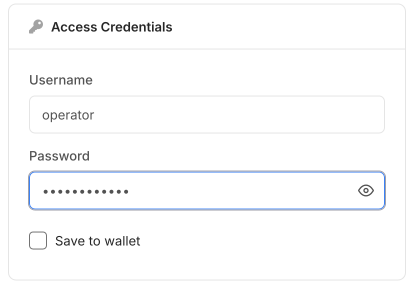
Username and masked password Analyse the stream
Use List streams to inspect available streams, select the stream to record, then choose Analyze Stream.
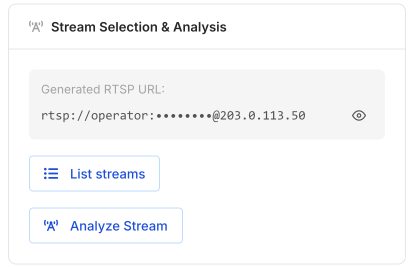
Stream selection and analysis
Step 4 Choose a recording licence
Check the recording quality
Under Recording quality, review the camera’s detected resolution and the selected quality.
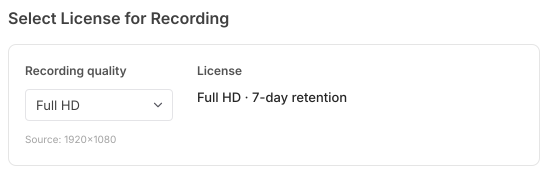
Recording quality selected for a 1920 × 1080 stream Assign a licence to the camera
Use Pick automatically to match a licence. To choose one yourself, compare the retention period, available camera slots and expiry date on each card.
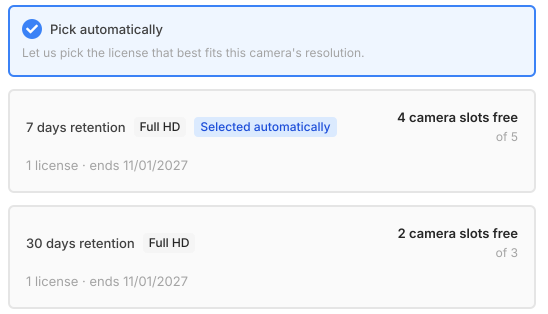
Licences with 7-day and 30-day retention
Step 5 Choose the time zone and add the camera
Choose the camera’s local time zone
Under Camera Timezone, select the time zone at the camera’s location. Use UTC +03:00 for Türkiye. Recording timestamps use this time zone.
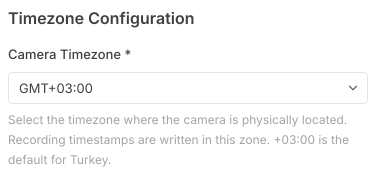
Camera time zone Review the summary and add the camera
In Summary, review the camera name, location, connection details, tags and selected licence. If the details are correct, select Add Camera.
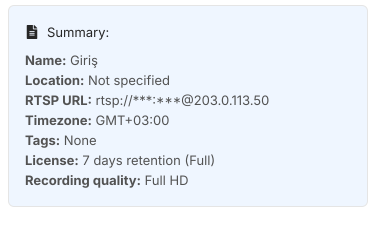
Connection and licence summary
NVR / DVR
Step 1 Connect to the recorder
Enter the address and channel range
Enter the externally reachable IP or DDNS address and RTSP port. Prepare network access for the recorder. Set the first and last channel numbers in Channel range.
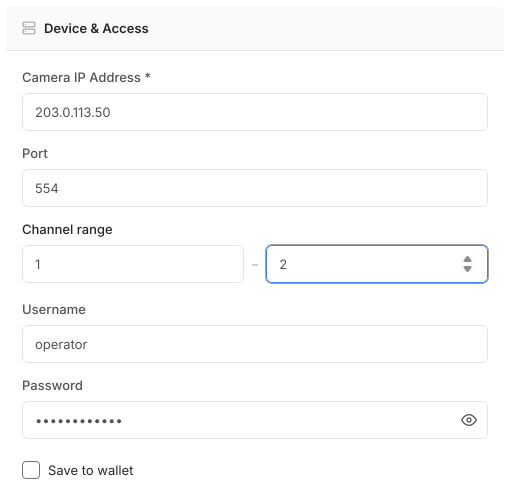
Address, port, channel range and credentials Enter credentials and scan for channels
Enter the recorder’s Username and Password, or select saved credentials. Click List channels. Discovered channels appear in the same step.
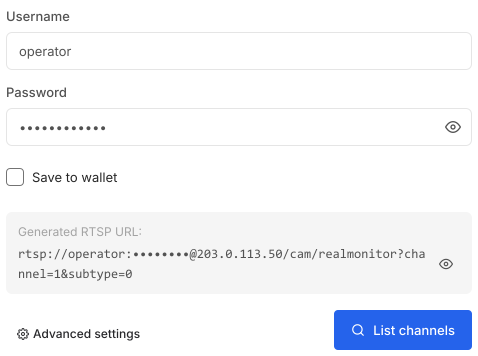
Credentials, RTSP address and channel scan
Step 2 Select the channels to add
Select the channels
Use the checkbox at the start of each row to select the channels to add.
Scroll sideways to see the other columns.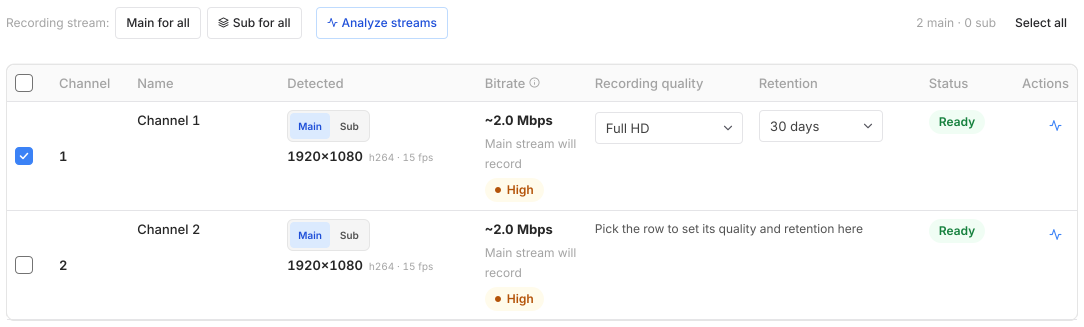
The first channel selected in the channel list Choose the stream to record
Choose Main or Sub for each channel. Check whether a substream is available and review its detected resolution. Click Analyze streams to check stream connection and bitrate information.
Scroll sideways to see the other columns.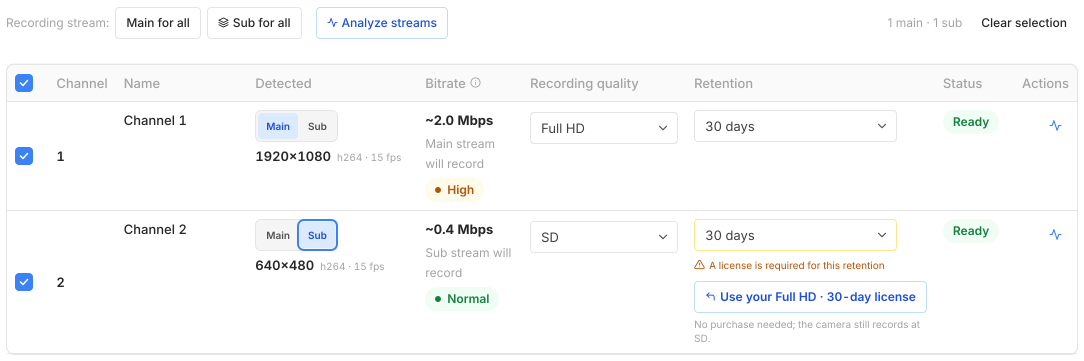
Main stream for channel 1 and substream for channel 2 Check recording quality and channel status
Review Recording quality and Retention for the selected channels. Use Status to identify unverified channels or authentication failures. Edit connection details and scan again if needed.
Scroll sideways to see the other columns.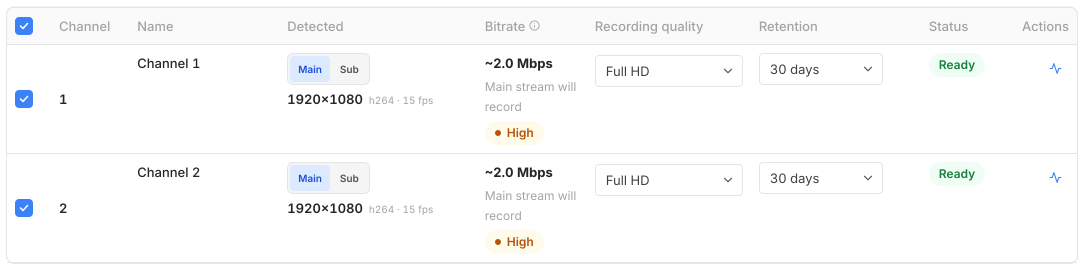
Recording quality, retention and status for both channels
Step 3 Name the channels
Name the recorder and its channels
The NVR Name forms the starting point for channel names. Use a recognisable name in each Camera Name field.
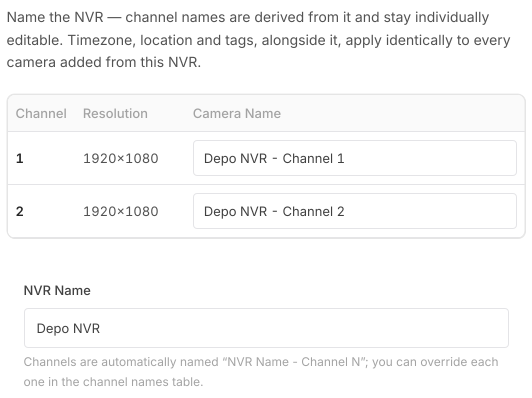
Recorder name and the two channel names derived from it Set the shared channel details
The Timezone selection applies to all channels added from the recorder. Choose UTC +03:00 for Türkiye. The Location and Tags selections apply to every selected channel.
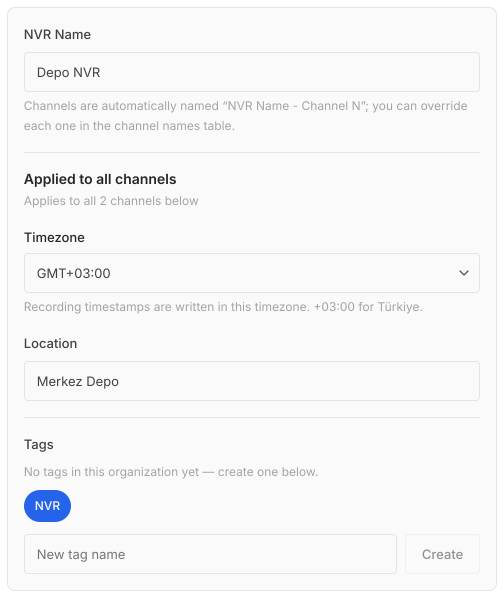
Time zone, location and tags shared by all channels
Step 4 Check each channel’s licence
Check available camera slots
Check which camera slots are used by this batch and which remain available.
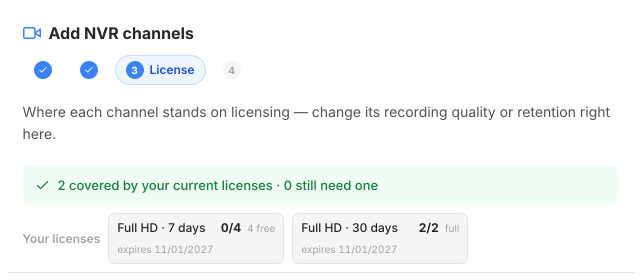
Available licences and camera slot usage Choose a licence for each channel
You can adjust recording quality, retention and licence separately for each channel.
Scroll sideways to see the other columns.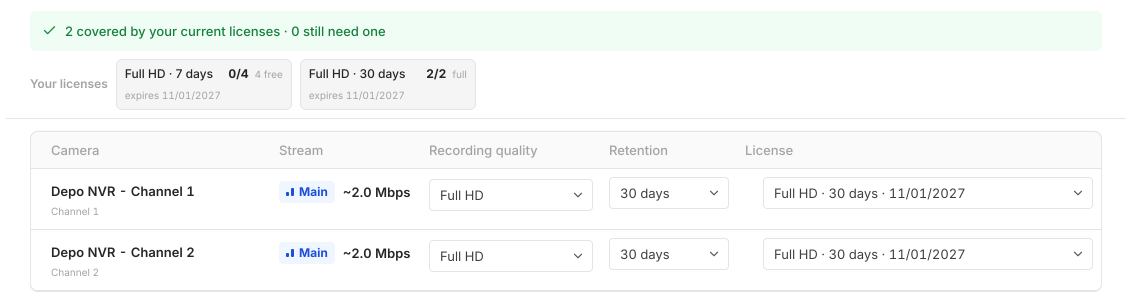
Stream, recording quality, retention and licence by channel
Step 5 Review and add the channels
Verify the selected channels
Under Summary, check the channel count, names and shared time zone. Review the recording quality and licence period for each channel.
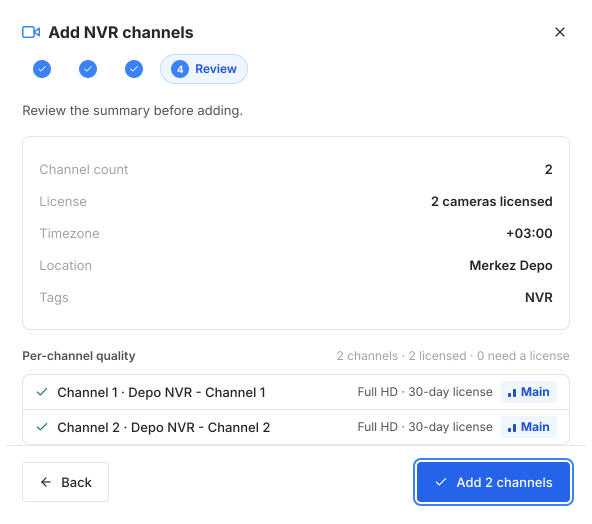
Shared settings, channel licences and the add button Add the channels and review the result
Select the add button showing the number of channels. In Result, review failures, skipped channels or channels without a licence.
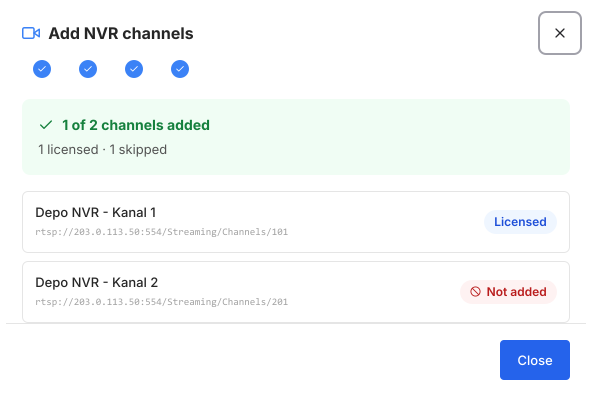
Add results and the outcome for each channel
Check the recording schedule
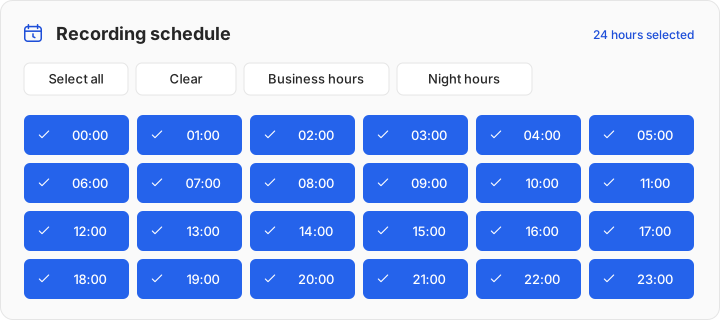
Open and check the first recording
Check recording status
Check the connection and recording status in the camera list. If the camera is not recording, check whether the current hour is scheduled.
Play the first recording
Select Play. Choose a day with footage in the calendar and select a point on the timeline. Check that the camera, date and time match what you expect.
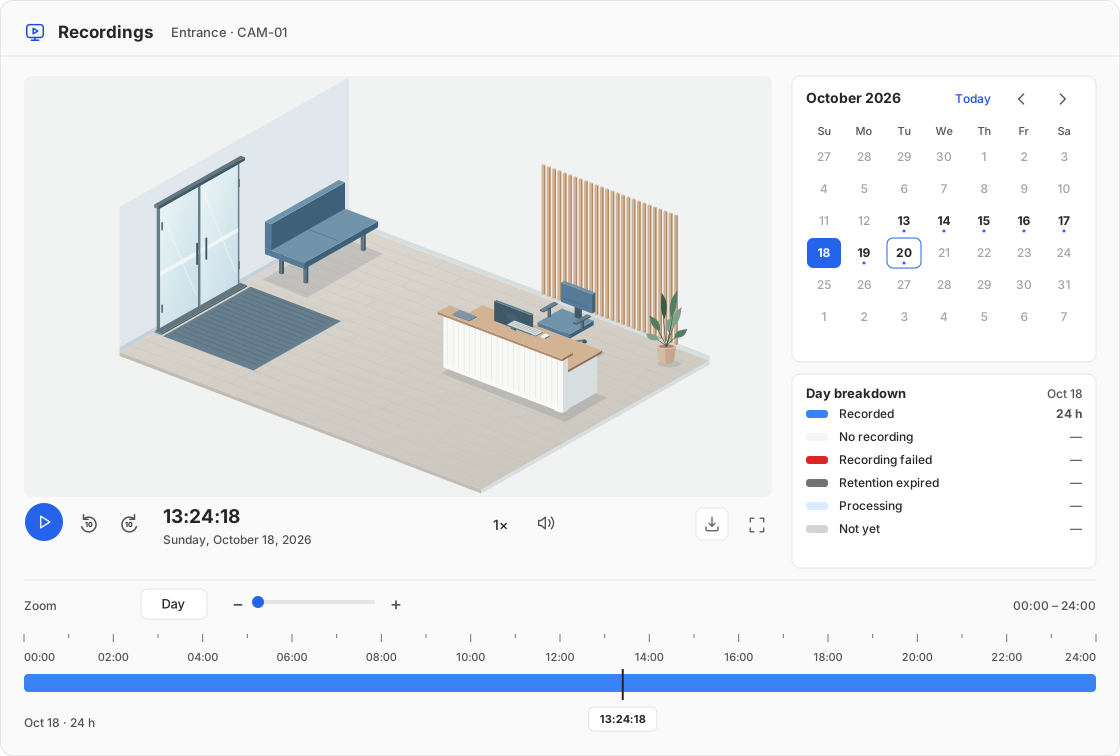
Calendar and recording timeline Check any gaps in the recording
Review gaps in the recording history. Consider the internet connection, recording schedule and licence status together.
When the connection fails
The camera cannot be reached
Check the public IP and network access settings with your network administrator. A local IP or CGNAT may prevent an incoming connection.
Credentials are rejected
Verify the camera’s username and password. If the password changed on the camera, update the details in the panel too.
The stream is unavailable
Check the manufacturer’s RTSP stream path and port. A path from another camera model may not work for yours.